ELUSIVEINFLUENCE AI

AI education and creative systems for creators who care about realism, consistency, control, and premium visual execution.

◎♪◉✉

Platform

HomeCourseCurriculumWorkflowsShowcase

Company

AboutCommunityPricingContact

Legal

Terms of ServicePrivacy PolicyRefund Policy

Stay Connected

Get new workflows, platform updates, and creator insights.

© 2026 Elusive Influence AI. All rights reserved.

Real systems. Real visuals. Built for creators.

ELUSIVEINFLUENCE AI
HomeAboutCourseCurriculumCommunityWorkflowsShowcasePricing
Join the SystemLog In
HomeAboutCourseCurriculumCommunityWorkflowsShowcasePricing
Join the SystemLog In
WORKFLOW BREAKDOWN

THE MIRROR ILLUSION

From Static AI Image to a Realistic Influencer Video That Feels Alive

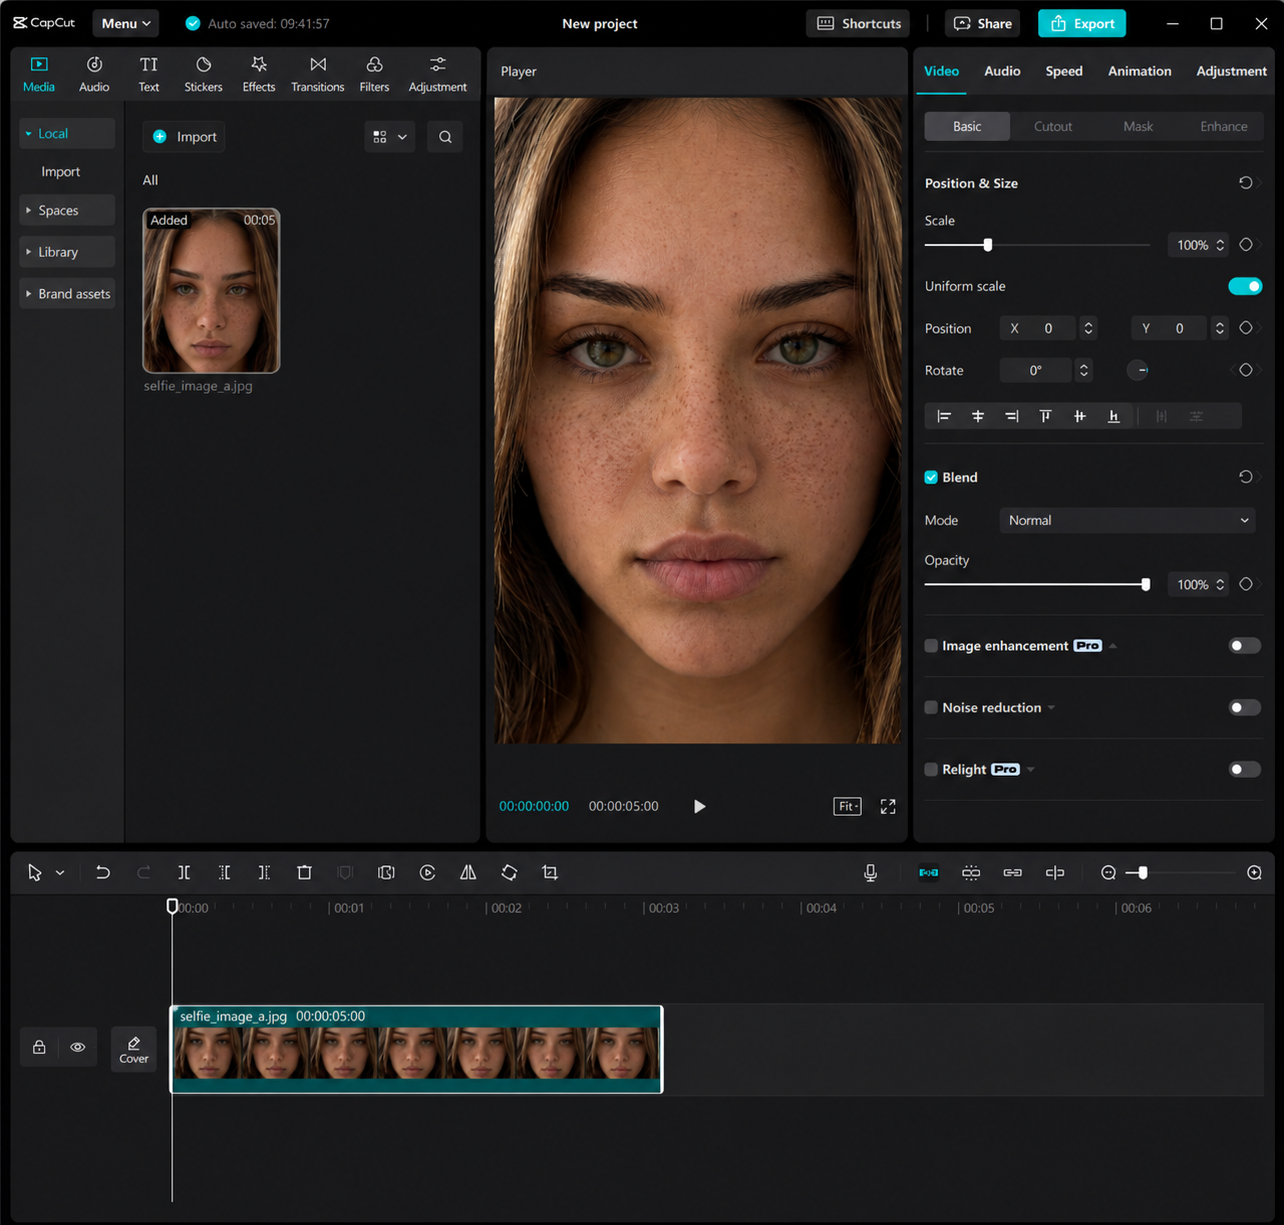
The exact workflow behind turning one base face into a polished, high-end AI creator clip, and the biggest realization is that realism is not one prompt. It is a chain of controlled decisions.

The Mirror Illusion base image

The Transformation Journey{Step by Step}

1

STARTING WITH A STRONG BASE IMAGE

The goal at the beginning was not to create the final video yet. The goal was to build a strong identity foundation. A weak base image will always create problems later: face drift, fake skin, inconsistent hair, strange expressions, and unstable video motion.

The base image needed to feel clean, realistic, and believable before anything else. This is the part most people rush, but it is actually where the entire workflow is won or lost.

The first mistake many creators make is thinking, “I’ll fix it later in video.” But video tools amplify flaws. If the face already looks slightly fake, the motion will usually make it look even more fake.

So the logic was simple: before asking the AI to move, speak, blink, smile, or perform, the identity had to look strong enough as a still image. The face, skin texture, hair, eyes, and overall realism had to be locked first.

🔒Inside the Premium Discord Community, I dropped the exact base-image realism structure I use before moving anything into video, because this is the part that saves hours of failed generations later.🔒

2

TURNING THE BASE IDENTITY INTO A LIFESTYLE MIRROR SELFIE

Define the creator identity before motion begins.

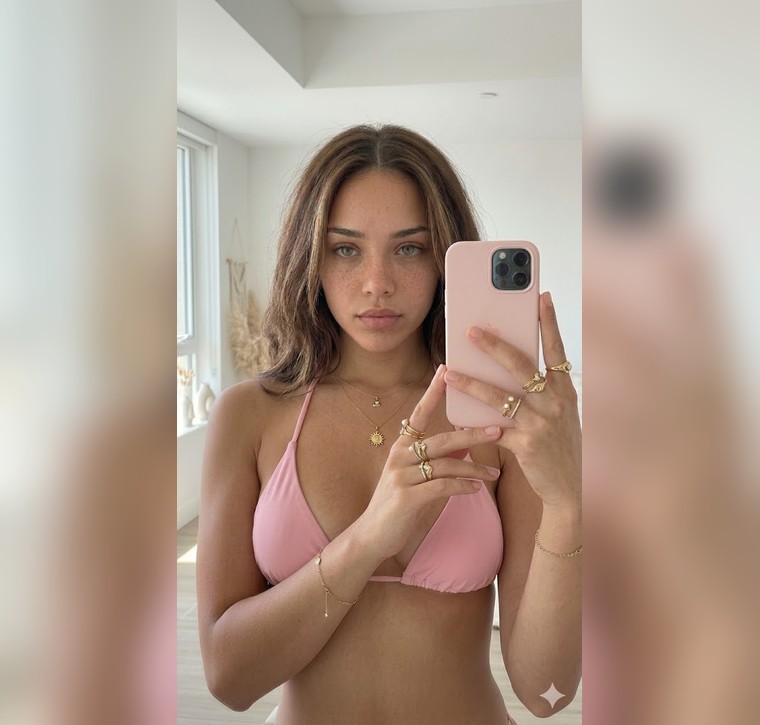
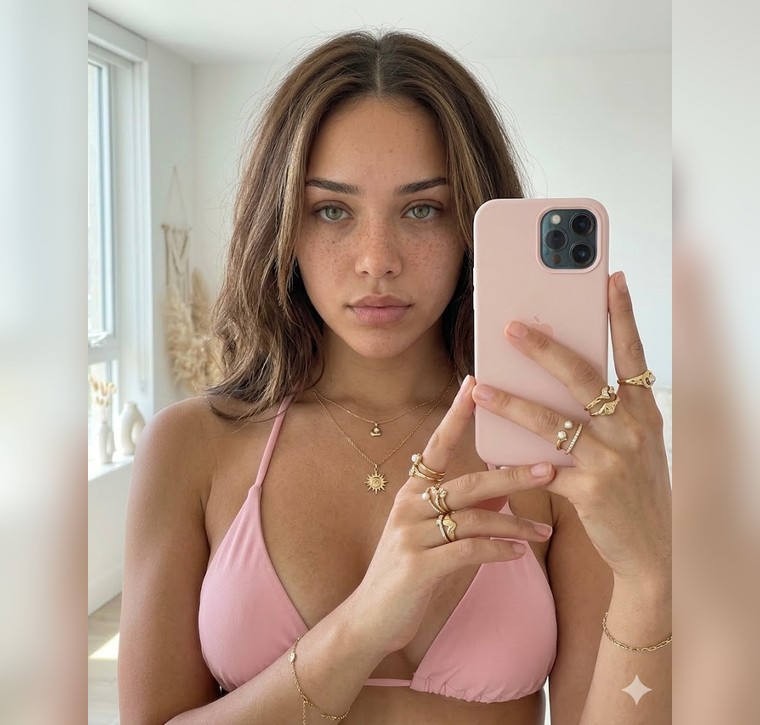
Next, the goal was to transform the static portrait into a believable lifestyle image: a mirror selfie with natural lighting, soft expression, realistic jewelry, a phone in-frame, and a polished creator-style aesthetic.

This was not just about making the image “pretty.”

It needed to feel like a real phone photo someone could believe came from Instagram.

The risk here was over-polishing.

AI loves to make skin too smooth, jewelry too perfect, fingers too clean, and lighting too artificial.

That instantly breaks realism.

So the fix was to guide the image around believable imperfections: natural pores, soft facial micro-details, realistic skin variation, believable hair strands, wearable jewelry, and lighting that felt like it came from a real room.

The logic was not “make it flawless.”

The logic was “make it convincing.”

I dropped the exact identity-locking and realism-control wording for this inside the community, including the parts that keep the face recognizable while changing the scene.
Workflow image 1
3

FIXING THE WRONG ASPECT RATIO FOR REELS

Use the base image as the anchor for realism.

After the first mirror-selfie version looked good, the next objective was to make it work for vertical short-form content.

A beautiful image is not enough if the framing does not fit the platform.

The image had to become vertical, optimized for a 9:16 Reels-style format, without losing the face, phone, jewelry, and natural room composition.

The mistake was starting with a composition that did not perfectly match the final platform.

This is common.

You create a strong image, then realize it does not fit the actual content format.

The logic behind the fix was to adapt the frame before moving into video.

If the image is not vertical before animation, the video model may crop important details, stretch the subject, or create awkward framing.

In the Discord, I show the exact way I handle aspect-ratio corrections without destroying the original realism or composition.

Workflow image 2
4

REMOVING THE FAKE SOCIAL MEDIA OVERLAY

Turn a still image into something that feels alive.

Once the image was converted into a vertical format, the goal was to keep it clean and usable as a video start frame.

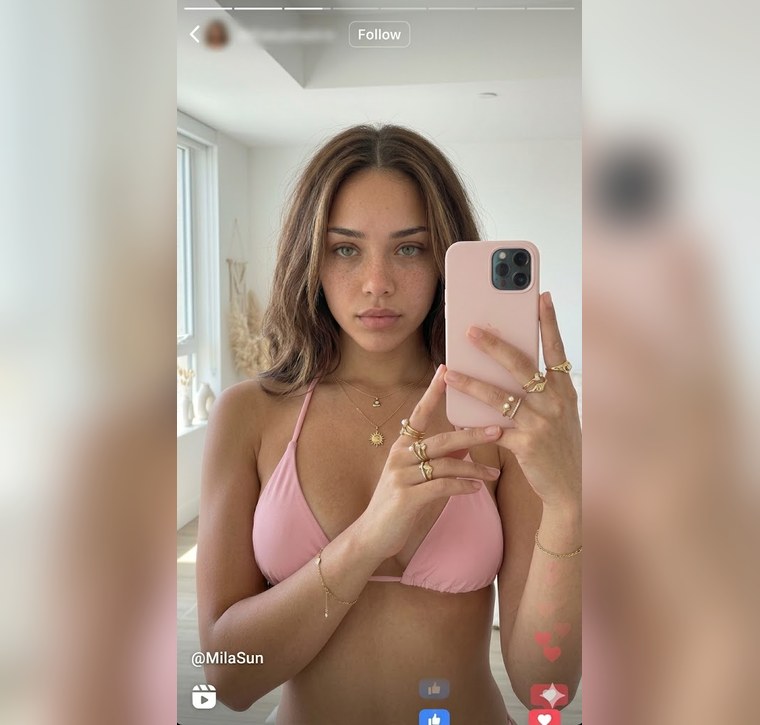
The image accidentally came back looking like an already-posted Instagram Reel, with interface-style icons and extra elements.

That was not usable for the actual workflow because it would make the final video look fake before it even started.

The mistake was that the model interpreted “Instagram Reels” too literally.

Instead of only creating the correct vertical format, it added platform UI elements.

This is a very common AI issue: when you ask for a platform style, the model may generate the platform interface instead of just matching the content format.

The fix was to remove the extra UI clutter and preserve only the subject and background.

The logic was to keep the image as clean raw material, not a finished posted mockup.

I added the exact cleanup wording inside the Discord so you can remove unwanted UI, text, icons, and fake overlays without damaging the main image.

Workflow image 3
5

CREATING THE MACRO CLOSE-UP REALISM SHOT

Clean the visual before the final transformation.

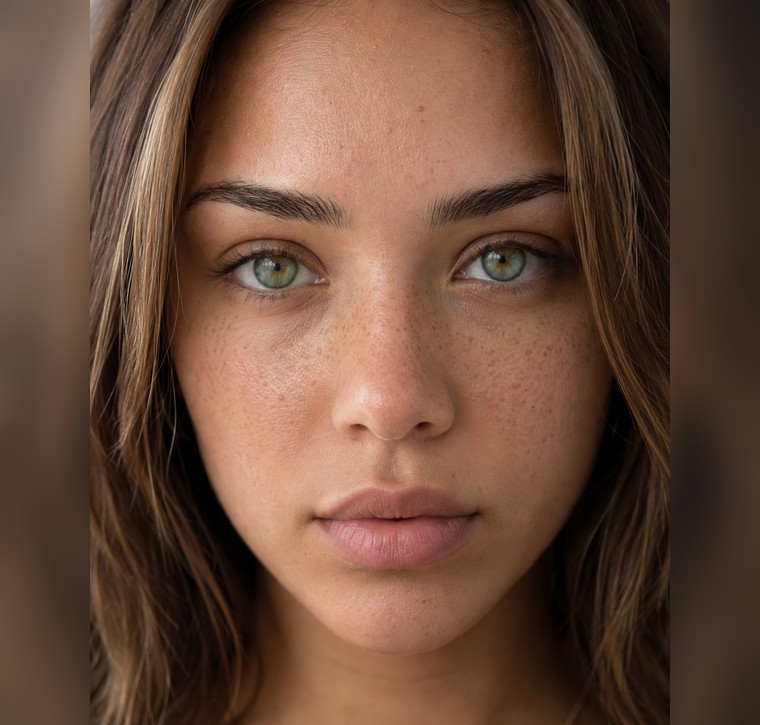
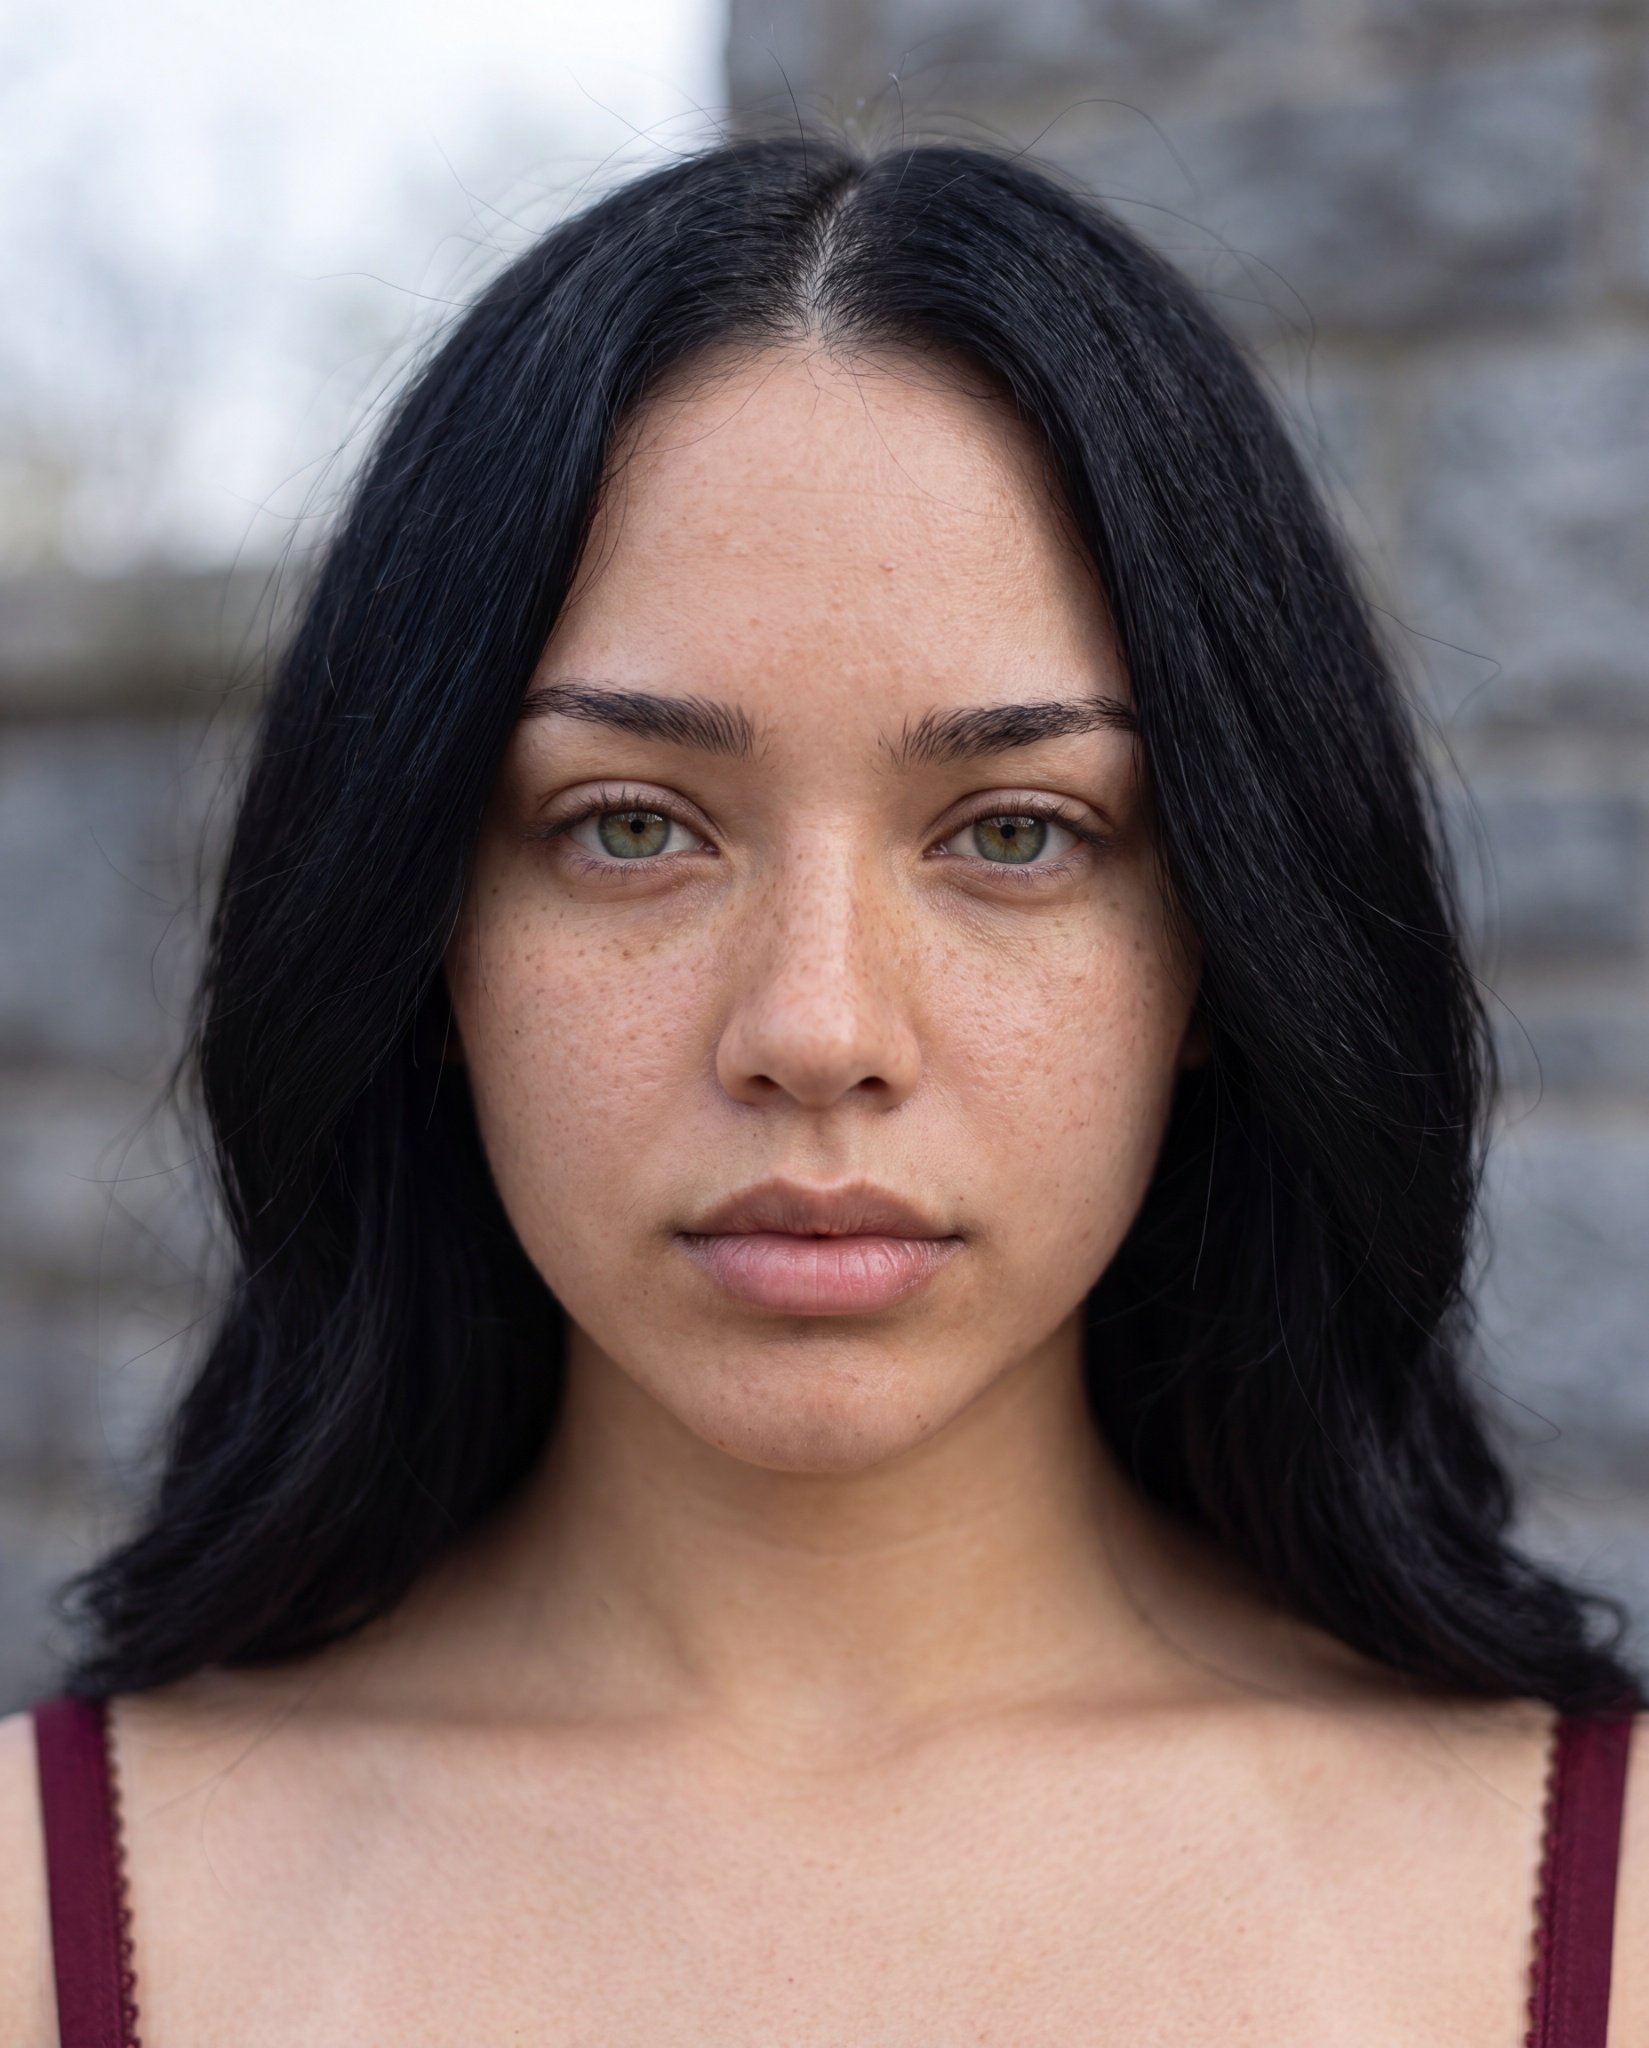
After the mirror selfie was ready, the next goal was to create a second visual asset: an extreme close-up of the same identity.

This close-up was important because it gave the final video contrast.

Instead of one continuous mirror-selfie shot, the workflow could now jump from “friendly influencer” to “wait… this feels too real.”

That close-up needed intense realism: skin pores, freckles, natural texture, detailed eyes, believable lip texture, and a photographic macro feel.

The mistake at this stage is usually going too cinematic or too perfect.

Close-ups expose everything.

If the skin becomes waxy, if the eyes look glassy, or if the lips look over-rendered, the whole illusion breaks.

The logic was to push realism through texture, not beauty.

Real skin has variation.

Real eyes have depth.

Real lips have fine lines.

The goal was not to make her look edited; the goal was to make the viewer lean in and think, “This looks like a real person.”

The exact macro-realism structure is inside the community, including how to get close-up detail without triggering that over-sharp AI look.

Workflow image 4
6

CORRECTING THE CLOSE-UP FOR VERTICAL VIDEO

Study what makes the image feel believable.

Just like the mirror selfie, the close-up also needed to be adapted to the final video format.

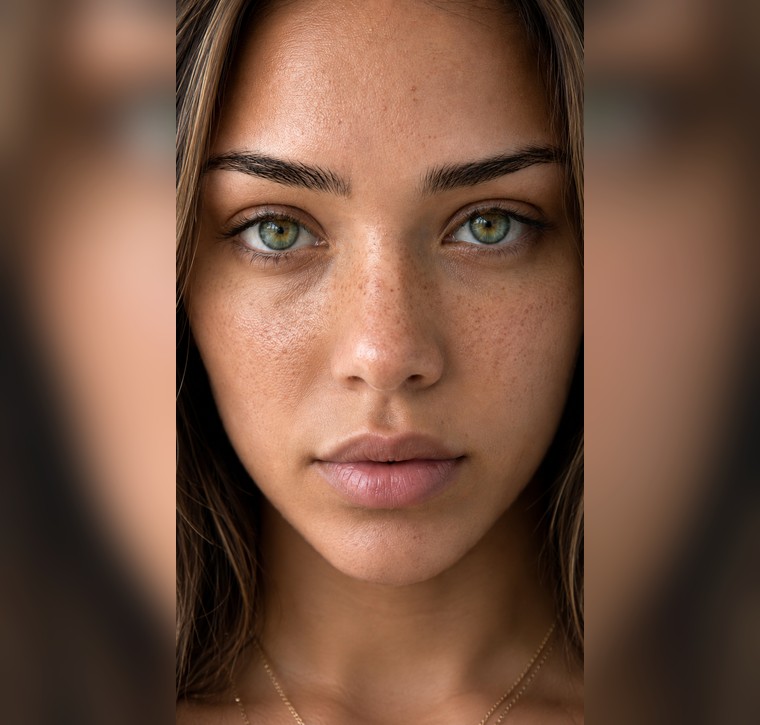
The goal was to make the macro shot work as a vertical 9:16 scene while keeping the face centered, intense, and realistic.

The mistake would have been using the close-up as-is and hoping the video tool framed it correctly.

But video tools often interpret framing differently once motion is introduced.

The logic was to control the close-up before animation.

That way, the face stays locked, the eyes remain the focus, and the viewer gets a strong visual jump when the video cuts from the warm selfie scene into the intense macro scene.

Inside the Discord, I show how I prepare alternate start frames for jump cuts so the video feels intentional instead of randomly stitched together.

Workflow image 5
7

REDUCING THE EXTRA SHINE

Prepare the image to become a realistic creator clip.

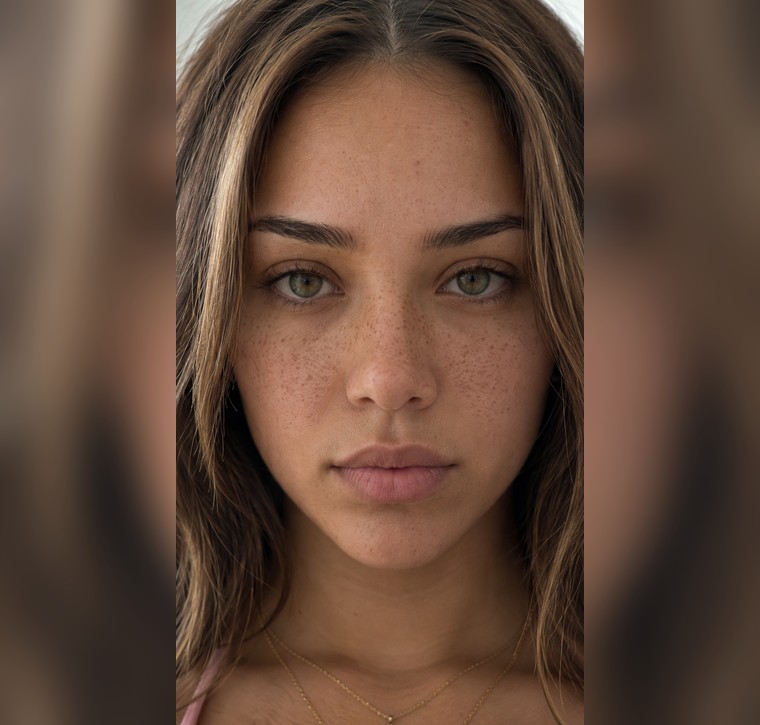
The close-up had strong realism, but there was one issue: the skin shine was slightly too much.

The goal was not to remove texture.

The goal was to reduce the excess gloss while keeping the face alive and believable.

The mistake here would be overcorrecting.

If you remove too much shine, skin becomes flat and plastic.

If you leave too much shine, it starts to look oily, synthetic, or overly rendered.

The logic was balance.

Real skin reflects light, but it should not look like a beauty filter or a wax surface.

The fix was subtle: reduce the distracting shine while protecting the pores, freckles, and natural skin detail.

I dropped the exact correction language in the Discord because this tiny adjustment is one of those realism details that makes a huge difference.

Workflow image 6
8

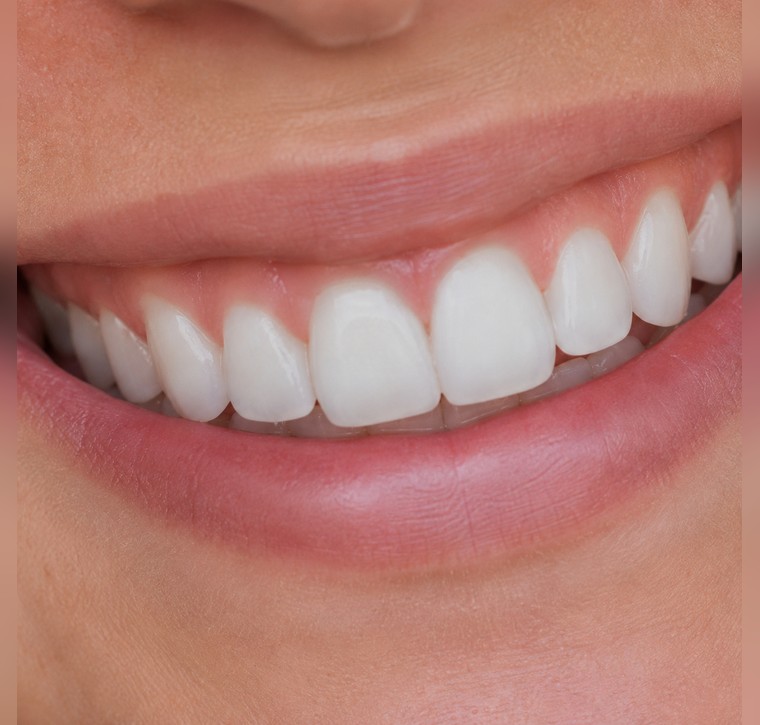
CREATING THE TEETH CONSISTENCY ELEMENT

Polish the full illusion into a high-end creator result.

Before generating the video, I created a separate teeth-and-gums reference to keep the mouth consistent during speech.

Teeth are one of the first things that break in AI video, so this step helped protect the realism before movement started.

The mistake would be relying only on the main face image to control the mouth.

Once the character starts talking, the AI can make the teeth shift, change shape, become too white, or distort the lips.

The fix was to use a teeth-only consistency element so the teeth stayed stable without changing the lips, mouth shape, or facial identity.

I dropped the exact teeth-control setup inside the Discord, including how to keep the teeth consistent without letting the reference damage the mouth movement.

Workflow image 7
9

UPSCALING THE KEY IMAGES BEFORE VIDEO

Strengthen the source frames before animation.

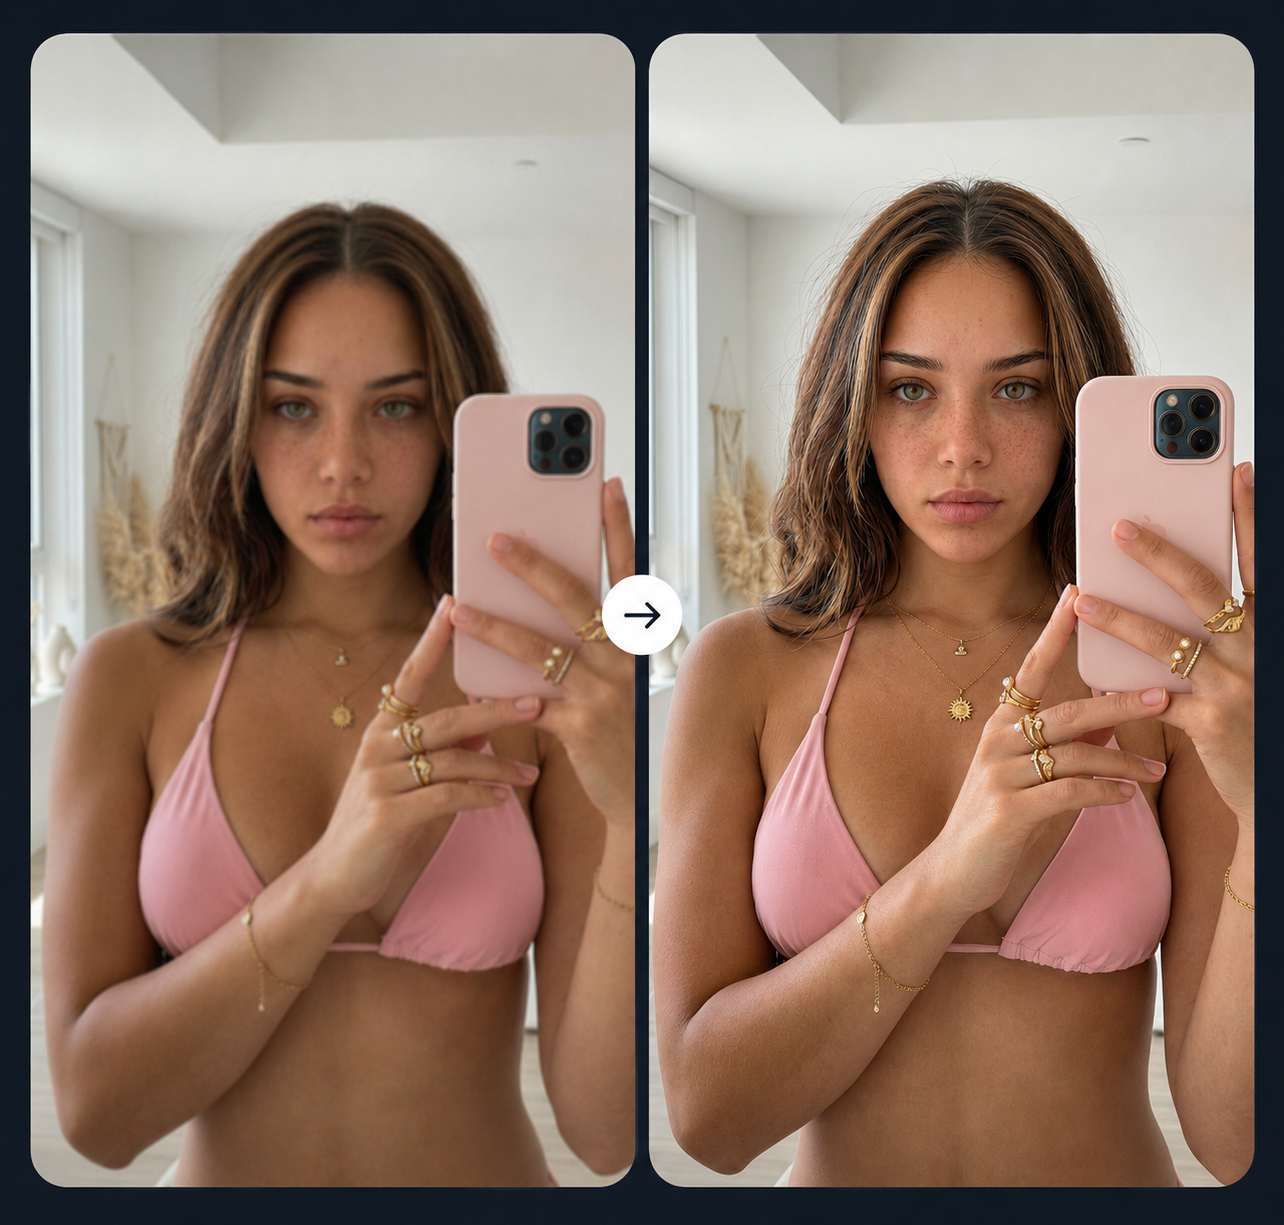
Before moving into video, both important image assets were upscaled.

This step matters because video models perform better when the input image has enough clean visual information to work from.

Upscaling can improve perceived sharpness, detail retention, facial clarity, jewelry detail, skin texture, and overall image quality.

It gives the video model a cleaner frame to interpret.

The mistake many creators make is sending low-detail images straight into video.

Then they wonder why the face melts, the teeth drift, the hands warp, or the details become unstable.

The logic was to strengthen the source images before asking the video model to animate them.

Better inputs usually give the model fewer opportunities to invent or distort important details.

Inside the community, I explain when upscaling helps, when it does not, and how to avoid the over-sharpened look that can make AI images feel fake.

Workflow image 8
10

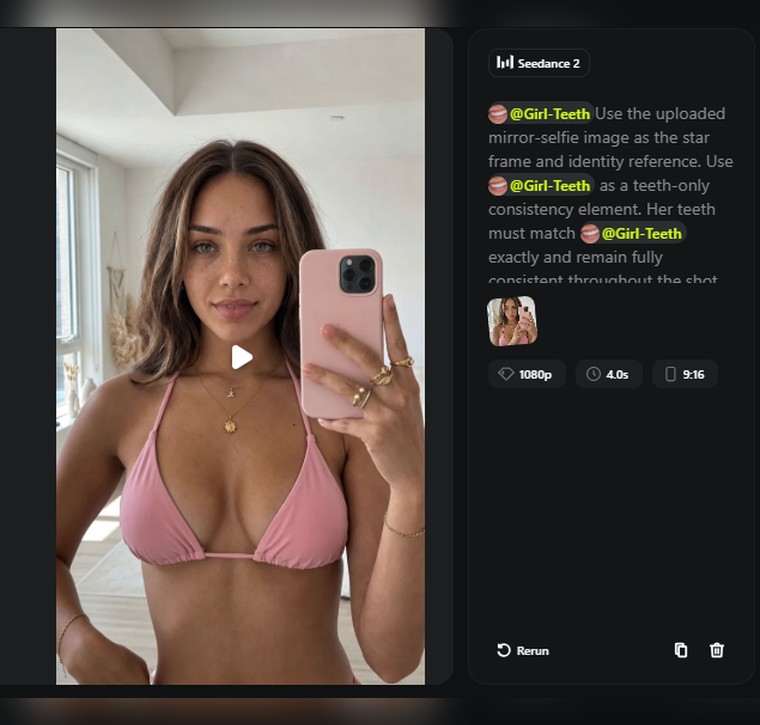
BUILDING THE FIRST VIDEO CLIP FROM THE MIRROR SELFIE

Turn the mirror selfie into a controlled creator performance.

Now the workflow moved into video.

The first clip used the mirror-selfie image as the start frame, with the goal of creating a short, natural creator-style performance.

The scene needed to feel intimate, calm, and human: natural blinking, breathing, subtle facial movement, controlled hand gestures, believable eye focus, and clean lip sync.

The biggest mistake in AI video is asking for too much performance.

If the acting is too dramatic, the face can drift.

If the hand motion is too big, the fingers can warp.

If the expression changes too aggressively, the identity can break.

So the logic was to keep everything subtle.

Small movements feel more realistic and give the model less room to fail.

This is also where the teeth and gums consistency element became important.

Teeth are one of the fastest ways AI video breaks realism.

If the smile, mouth, or teeth change between frames, the viewer notices immediately.

I dropped the exact teeth-consistency method and performance-control wording inside the Discord, including how to keep the teeth stable without letting them distort the lips or mouth shape.

Workflow image 9
11

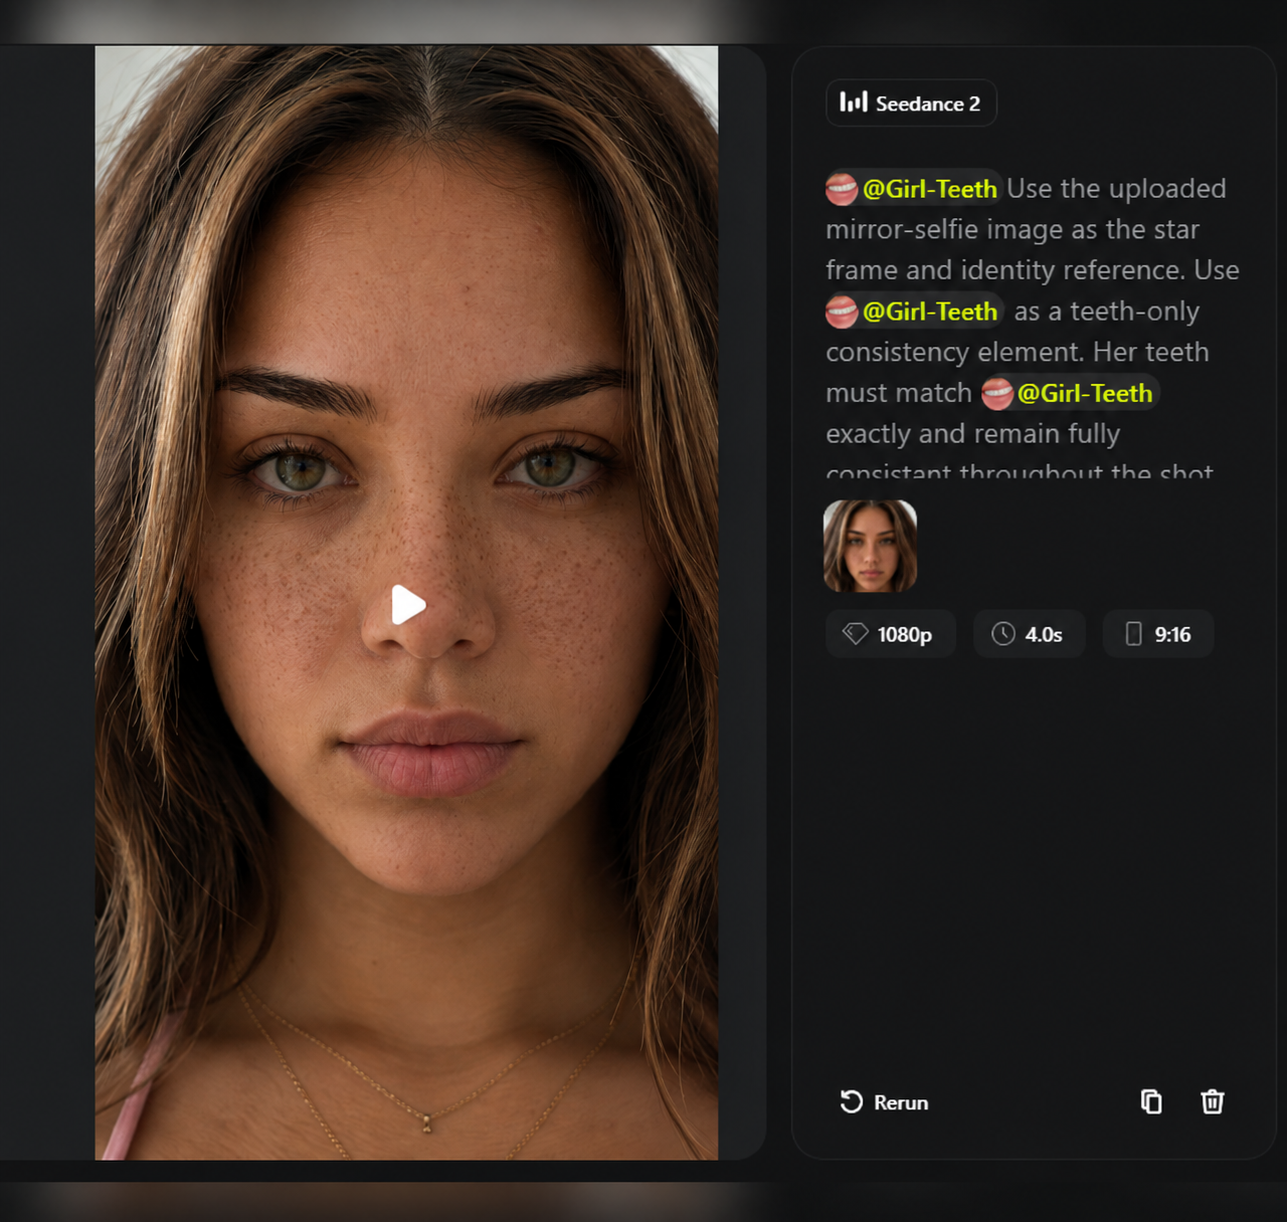
CREATING THE JUMP-CUT MACRO CLOSE-UP SCENE

Shift the video into a more intense realism moment.

The second video clip changed the emotional tone.

Instead of staying in the soft mirror-selfie world, the video cuts into an extreme close-up.

This is the moment where the content becomes memorable.

The warm influencer energy drops, the camera is tight, and the viewer is pulled into a more serious, almost uncanny level of realism.

The mistake would be making the close-up too still or too animated.

If it is too still, it feels like a frozen image with moving lips.

If it moves too much, the face can distort and lose identity.

The logic was to create controlled human stillness: subtle breathing, tiny facial micro-movements, realistic eye activity, and enough life in the face to feel real without becoming unstable.

This is where the transformation becomes powerful.

The viewer goes from, “This looks like a nice AI image,” to, “Wait… this person does not actually exist?”

The exact jump-cut structure and close-up performance language are inside the community, because this is where small wording changes completely change the final realism.

Workflow image 10
12

FINAL VIDEO POLISH AND ASSEMBLY

Turn separate AI generations into one intentional piece.

The last stage was about making the clips feel like one intentional piece of content, not a collection of random AI generations.

The mirror-selfie scene gives the viewer warmth and familiarity.

The macro close-up gives the reveal weight.

Together, they create a stronger transformation: from a static base image into a believable AI influencer-style video with expression, motion, voice, teeth consistency, and cinematic tension.

The mistake would be thinking the “generation” is the final product.

It is not.

The final product comes from the sequence: strong base image, controlled realism, platform framing, cleanup, close-up contrast, upscaling, video movement, consistency elements, and final polishing.

The logic is that every step solves a specific problem before it becomes visible to the audience.

Inside the Discord, we break down the exact realism tactics, character-consistency wording, start-frame logic, and master prompts that make this workflow repeatable instead of random.

Workflow image 11

THE ULTIMATE CLIMAX

The real lesson behind the workflow.

This is the real lesson: high-end AI content does not come from one magic prompt.

It comes from knowing what to control at every stage.

The base image controls identity.

The mirror selfie controls believability.

The aspect ratio controls platform fit.

The cleanup controls professionalism.

The macro close-up controls emotional impact.

The upscaling controls detail retention.

The video prompt controls performance.

The teeth element controls consistency.

The final polish controls whether the whole thing feels intentional.

And that is the difference between a random AI output and a workflow you can repeat.

If you want to skip the trial and error, I dropped the unlocked version inside the Discord — the exact realism tactics, the character consistency words, the teeth-control method, the master prompt structures, and the decision logic behind each step.

You will also be able to compare your results with other creators, ask where your workflow is breaking, and learn how to diagnose the difference between a prompt problem, a realism problem, a consistency problem, and a video-control problem.

The public breakdown gives you the framework.

The Discord gives you the keys.

▣

EXACT PROMPTS ARE LOCKED FOR MEMBERS

You’re seeing the what and why behind this workflow. The exact prompts, settings, and tokens that make it work are reserved for paid members to protect authenticity and quality.

  • ▣ Exact prompts locked
  • ▣ All settings & parameters
  • ▣ Reference & model notes
  • ▣ Pro tips & advanced tweaks

WANT THE FULL SYSTEM?

This workflow page teaches the reasoning. Our course and community unlock the exact prompts, settings, and advanced training to master it.

Join the Community →Explore the Course →
▱
♙